Winners!
Thanks, everyone, for playing! The two winners are DarinP. and MyGirls01. I have emailed the winners. I think I need to do this more often! 🙂
Congrats!
The Reader & Author Get Together 2013

It was a long drive from North Dakota to Ohio, but I hate to fly, so it was worth it. My friend Jessica went with me again this year. I had a fantastic time at the RAGT, as I always do. And as I always do, I forgot to take many pictures. I always have such good intentions but you know what they say about the paving on the road to that hot place 🙂
We arrived on Thursday in the late afternoon and one of the first people I saw was Paige Tyler. She and her hubby Paul have been super nice to me each of the three times I’ve gone to the RAGT. They saved a spot for us at their table and we sat with them for every meal. I didn’t get a pic of them (darn it!) but here is one of me and Paige and Brenda Wheeler, a member of Paige’s street team. Brenda was a fun lady and I’m glad I had a chance to get to know her. Her husband Don joined us, and I have to say, he’s a great guy to accompany his wife to a romance readers convention. That’s true love!

On Friday morning I went down to the Liquid Silver Books Boardroom to meet Monette Michaels and Linda Eberhart from my publishers, and then Paige grabbed me to help stuff the 500+ goodie bags. It was surprisingly hard work, but it was fun. Here is a pic of my friend Jessica with a bag. isn’t that pink leopard print cute?
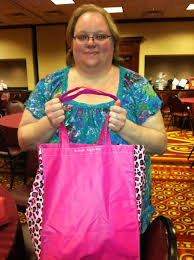
the goody bag
That evening I was one of the authors signing. I’m not including that pic, because I look as dumpy as an overweight hippo stuffed into a blouse that showed every bulge. But I had fun! I sat beside Anara Bella, who was so friendly she helped settle my nerves. I got to see Robyn Bachar and her friend Diana. They are so much fun!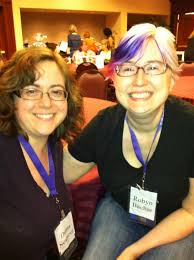
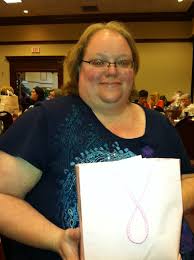
And I got to meet up with Jessica Bowes, who had won the shawl I knit for a blog hop prize. Isn’t that cute on her? She and her mom look like sisters, not mother and daughter.

I also got to have a 20 minute met and greet in the LSB boardroom.


Jessica and I both won two raffle baskets, which rocked, because Jessica and pretty much stuffed one bag with her name. She REALLY wanted that set of books!
On Saturday I got to hang out with writing partners Christine Lawrence and Steph Smith. Since they live a couple of hours away from each other they don’t get the chance to actually sit down together in person. They were kind enough to let me interrupt their work for me to visit with them.

There were so many other people I enjoyed seeing and talking to, but of course, I didn’t get pics.
It was a busy, busy, fun, fun weekend! Jessica and I got home around suppertime on Monday. I’m already looking forward to next year!
Tuesday Teaser 4/2/13 Quill & Ellie’s Wedding Night
There. That got your attention, didn’t it? 😉
Here is a scene from Quill and Ellie’s wedding night. They’ve consumated their marriage and are lying side by side in bed. He’s been telling her what he and Sky have been doing in Omaha. This scene may be changed significantly or even cut entirely from the book. I haven’t even re-read it yet so it probably has awkward moments and goofs.
“Omaha sounds awful.” Ellie shivered against him. “I don’t understand why the women allow themselves to made into prostitutes. Can’t their families protect them?”
That very question had driven his wolf insane for six years. “The city guard is like an army, and the mayor is its commander. People don’t have much choice. If they are wealthy, they can pay the tax to keep their daughters at home or to find them a husband and pay the marriage fee. Poor families who try to resist find their homes burned.” Quill had to make an effrot to keep his wolf from howling his rage. “And a lot of women like being prostitutes. They have independence and money, and a lot of them like having sex.”
“Ew,” Ellie shuddered.
Horrified, he lifted his head to stare at her. She hadn’t seeemed unhappy a few mintues ago. “Don’t you like sex?”
“With you. Not just any stranger off the street.”
That laid a sheet of soothing warmth over his heart. “Well, some of the women do. The ones who don’t, try to come to Ms. Mary’s house. We arrange some domestic work for them and pay their city tax out of the house’s cut.”
Ellie leaned up on one elbow, trying to see him in the scant moonlight. “How can the house make a profit?”
“It doesn’t. Ms. Mary made Sky her partner, and all they want is enough to keep things going until they …” He trailed off, debating whether or not to tell her the whole truth. He tugged her face to his and sunk his voice to the barest whisper in her ear. “Until they are able to get rid of the mayor. Don’t tell anyone. If the mayor somehow heard that, he would have Sky killed.”
“Sky should come home!”
“But then who would take care of the ladies at Ms. Mary’s house? They’re his Pack”
Her small fist thumped lightly on his shoulder. “I don’t advocate violence, but why doesn’t he just kill the mayor?”
The thought of the chaos that would erupt as various factions fought for power in Omaha made him cringe. “Too many innocent people would die unless there was someone strong enough to take control.”
“Is that what Sky wants? To be the next mayor?”
“No.” He and Sky had talked that over several times. Sky didn’t want to stay in Omaha; he wanted the plains and the hills and his mate. “He wants a strong and fair government in place in Omaha. He’ll be back when he has that. He wants his mate. I can’t tell you how many nights he and I stayed up ’til dawn talking about you and Rose and how much our wolves needed you.”
She gave a lady-like grunt. “He could bring Rose to Omaha.”
“No.” That was definite. “Omaha is an evil place. I wouldn’t want my mate there. I hope you never want to go to Omaha. It would half-kill me to deny you anything, but–”
She laid her head on his shoulder, snugglingclose. “Aren’t you lucky? I’m right here.” A shadow of a laugh shook her voice. “Why don’t you show me what else you learned while you were guarding ladies in Omaha?”
Relief shook him. She didn’t hold his days in an Omaha whorehouse against him.
Steampunk!


My one and (so far) only steampunk outfit.
 What do you think?
Eddie’s Prize Ready for Pre-Order
 Eddie’s Prize will be released on March 18, 2013, for $5.99, but if you Pre-Order it from the publisher it will be 20% off. Go here and scroll down to Eddie’s Prize.
Blizzard Warning!
Yay for being inside! This is our first blizzard in a couple of years. The blizzard wrning extends until noon tomorrow. Boy, I hope they cancel work tomorrow. I REALLY don’t want to have to go out in that. I want to stay home and knit, and read, and (maybe, if all goes well) write the first love scene for Quill and Ellie. That man is about to lose his patience with me!

Tuesday Truth February 5, 2013: I’m busy!
Ack!!! I’m busy!
First, I’m buried in edits again. These are tough, and I have some re-writing to do, but I think Eddie’s Prize will be a far better book in the end.
Second, I am in the beginning stages of organizing an SCA event called Silks & Needles. It will be a day of classes on embroidery, weaving, spinning, etc. Tomorrow night is the Shire meeting where I need to present my budget. So, I guess I better get my budget smoothed out.
Third, my brother is coming to stay for the weekend. He’ll be here Friday. That means I need to CLEAN! He’s coming because …
Fourth, it’s my mom’s birthday party on Saturday night.
Did I mention I was busy?
Do I Look Innocent?
Do I Look Innocent?

This afternoon I spent a half hour in the billing office of the local mega-hospital/clinic conglomerate explaining to the woman (who was extremely unhelpful in the politest possible way) why I believe I had over-paid my bill by several hundred dollars and should have a refund. After about twenty minutes of going over all my receipts with them and showing them my itemized Health Spending Account (HSA) expenditures, I finally got the woman to admit, that, yes, I had over paid. The issue stemmed from the fact that they switched billing software in June. No, I couldn’t have a refund. Their policy was that they would apply any excess funds to my next bill.
Does she realize that I plan to NEVER see any doctor at their facility again? My regular doctor had left the clinic to move to a distant city and their billing practices have convinced me that I don’t want to use their services again.
Grrr! See the image above? Yeah, lady, you are about to become a minor character in Wolf’s Prize, and you are going down. Buh-bye.
No, I never did get my money, but I’m not giving up. I don’t know what i’ll do yet, but I have a bottle of wine and a pound of fudge. Soemthing will come to me.
Reading Weekend
I’m re-reading Kresley Cole’s Immortals After Dark series. Just finished Regin and Declan’s story and am about to plunge into Lothaire. I inhaled it when it first came out. Now I want to savor it. I should be writing or knitting or doing something productive, but you know how it is when you are into a series? Everything else can go hang. So I’m sitting here, sipping tea and reading.
Anyone else ever get like that?
Naughty New Year with Sky
Welcome to Maddy Barone’s stop on the Naughty New Years blog hop! If you fall off, you can Click Here to jump back on.
My current series is a futuristic paranormal with werewolves, but there are no cool futuristic weapons or technology. Nuclear war decimated the population and sent people back to living like it’s the American frontier all over again, and the only government is run by strong, ruthless men.
I decided to give you a teaser about Sky and Quill, two minor characters in a previous book who leave the werewolf den to live in Omaha since their chosen mates have been denied to them.
Good luck in the prize drawings. I will be drawing a name from those who leave a comment on my blog for a $10 gift card to Amazon. Members of my newsletter are automatically entered twice. That is in addition to the drawings for ebooks by the Just Romance Me folks. So, Enjoy and good luck!
The new year was only fifteen minutes away when the mayor of Omaha was admitted to Ms. Julia’s House of Joy. As host, Sky went to the entry to greet the latecomer to the New Year’s Eve party.
“Welcome,” he said with a cordial smile which hid dark and bitter things. Did McGrath have any idea Sky considered him his greatest enemy? Mayor McGrath handed his luxuriously warm overcoat to a fifteen-year-old girl who, until a month ago, had been picking up johns on the icy streets of Omaha. Mayor McGrath gave her a patronizing smile and a pinch on the ass as she took his coat. Though his wolf yearned to tear out the mayor’s throat, Sky maintained his friendly expression through years of practice.
“Tim, I’m glad you could stop in.” Sky shook the mayor’s hand and drew him into the reception room. “I’m sure you have several stops to make tonight.”
The mayor accepted a glass of champagne from a server. “Naturally, I want celebrate with as many of my people as possible, but I wouldn’t miss your party. Where better to ring in the New Year than at one of the fastest growing businesses in town? You’ve done a lot with the place in the past few years.”
Sky smoothed his sapphire blue silk tie with a self-satisfied smirk. At least, he hoped it looked self-satisfied. “Thanks, Tim. We’re managing to turn a nice profit, as I’m sure you’ve noticed by our taxes.”
“Yes.”
Tim McGrath’s tone was distracted. His gaze was fixed on LaToya, the newest lady in the house. He waved her eagerly over. LaToya shot a pleading look at Sky. He nodded at her and she came over, reluctance showing in her stiff steps. Sky looped an arm over her shoulders and pulled her close to his side.
“This is LaToya James,” he said. “LaToya, say hello to Mayor McGrath.”
“H-h-hello,” she whispered.
“Hello, young lady. Aren’t you a pretty little thing. I want you to join me after midnight.”
Sky produced a smile intended to convey regret. “LaToya is new. She just turned eighteen on Christmas Eve. I’m not ready to share her yet.” Without giving the mayor a chance to respond, he brushed his lips over LaToya’s hair. “Help Patricia in the kitchen, baby, and send Aimee over to us.”
The mayor chuckled while he watched LaToya hurry away. “One of the perks of being the owner of a whorehouse is sampling the employees?”
Sky shrugged enigmatically.
“I heard you’re engaged to a girl back home.” McGrath sipped his champagne with a raised brow.
And you’ve been married to a good woman for nearly thirty years, Sky inwardly sneered. Doesn’t stop you from humping any girl you can get your hands on. He nodded at Aimee as she joined them. She was beautiful and young enough to interest McGrath, and fully aware what she could expect from the mayor. “Tim, this is Aimee Chambord. I don’t think you’ve met her before?”
The mayor smiled widely at Aimee’s gaping décolletage. “Why no, I don’t believe I’ve met Ms. Chambord. Can I get you a glass of champagne, my dear? Will you excuse us, Sky?”
Sky waved them off with hidden relief. He circulated through the large set of reception rooms, checking to see that the bouncers were alert and none of his ladies was being mistreated. He was an Alpha wolf, and the men and women who worked in this house were his Pack, to protect and provide for. And —his eyes went cold when they found McGrath— kill for.
He glanced at his reflection as he passed a mirror on the landing of the main staircase. His black hair was neatly cut, his black silk suit was expensively elegant, his tie the same vivid blue as his eyes. A wave of weary disgust passed over him. No one in the Clan would recognize him. Even he didn’t recognize himself some days. There were times he doubted his wolf approved of him.
Quill, his cousin and beta, joined him, handing him a glass of champagne. Ms. Julia, the lady who had saved them when they’d first come to Omaha years ago, came with him and stood between them at the fancy carved railing. The three of them looked down over the dozens of people coming together to watch the clock count down the last few minutes of the year 2069.
“I’m leaving in the spring,” Quill said quietly.
Sky knew the day was coming when Quill wouldn’t be able to bear the vice and intrigue of Omaha, but he flinched anyway. “I understand, but I’m going to miss you.”
“Come with me,” Quill urged.
Sky watched McGrath as the man sipped champagne from Aimee’s cleavage. “I can’t. I have to finish what I’ve started.”
Ms. Julia, aging but not stupid, patted his arm. “What about your fiancée, honey? You let everyone think the wrong thing, but you can’t fool me. You love that girl. Go get her and bring her home.”
Rose. The mate his wolf had chosen for him five years ago. Longing so deep and sharp it was painful cramped Sky’s belly. He wrapped one hand over the bannister to brace himself. He could almost feel her blond hair under his fingers, the trembling warmth of her mouth under his. “I can‘t bring her here.”
Ms. Julia pursed her lips. “No girl is going to wait forever, you know, not even for a handsome young devil like you.”
“She’ll wait.” Grim certainty rang in Sky’s voice. Taye would see to it. But, oh, God, how he wanted to see her.
Quill met his eyes over the top of Ms. Julia’s silvering head and Sky knew that Quill understood. The two of them, deprived of their mates for over five years, understood each other’s pain all too well.
“Five!” shouted the crowd. “Four! Three! Two! ONE! Happy New Year!”
As horns blared and confetti swirled, Sky lifted his glass. “To Rose,” he whispered, and drank.